Process
How to Develop Film at Home: Developing Pinhole Negatives on Film and Paper
Develop film at home from pinhole cameras: the kit, black-and-white steps, stand development for uneven negatives, paper negatives, C-41 and scanning.
Pinhole negatives are rarely even. A roll from a box camera might hold one frame exposed for two seconds in sun and the next for four minutes in a church, both estimated rather than metered. Sending that roll to a lab means it will be processed exactly like any other, which is not always what such a roll needs. Developing film at home puts the decision about each roll back in the photographer’s hands.
It is also cheaper, quicker and less mysterious than it looks. Black-and-white film needs a light-tight tank, three chemicals and running water, and nothing but the loading step happens in the dark. Paper negatives, which many pinhole cameras use instead of film, can be developed in trays on a kitchen counter under a red light.
The kit
- A daylight developing tank with reels sized for 35 mm or 120 film.
- A changing bag, or a room that is genuinely dark, for loading the reel.
- A thermometer that reads accurately around 20 °C.
- Measuring cylinders, a jug and storage bottles for each chemical.
- Developer, stop bath, fixer and a wetting agent.
- Film clips or pegs, and a dust-free place to hang the film.
- For paper negatives: three trays, tongs and a safelight.
A tank with plastic reels is the easiest start because film can be ratcheted onto the spiral. Stainless steel reels last forever but take more practice to load. Practise with a sacrificial roll in daylight first, then with eyes closed, then in the bag. Sweaty hands are the usual reason film jams on a plastic reel, so dry hands and a dry reel save most of the frustration of the first attempts.
Developing black-and-white film, step by step
Black-and-white chemistry works at 20 °C as standard. Times in the manufacturers’ data sheets and in development charts such as the Massive Dev Chart all assume that temperature, and a degree or two either way changes the result noticeably.
- Load the film onto the reel in the changing bag, put it in the tank and close the lid. Lights on from here.
- Develop. Pour in the developer, start the timer, agitate as the data sheet says, usually a few inversions every minute.
- Stop. Pour out the developer and add stop bath, or plain water, for about a minute.
- Fix. Ilford Rapid Fixer at 1+4 needs two to five minutes for most films, with regular agitation.
- Wash. Ilford's water-saving method fills the tank and inverts it 5, then 10, then 20 times, changing the water between.
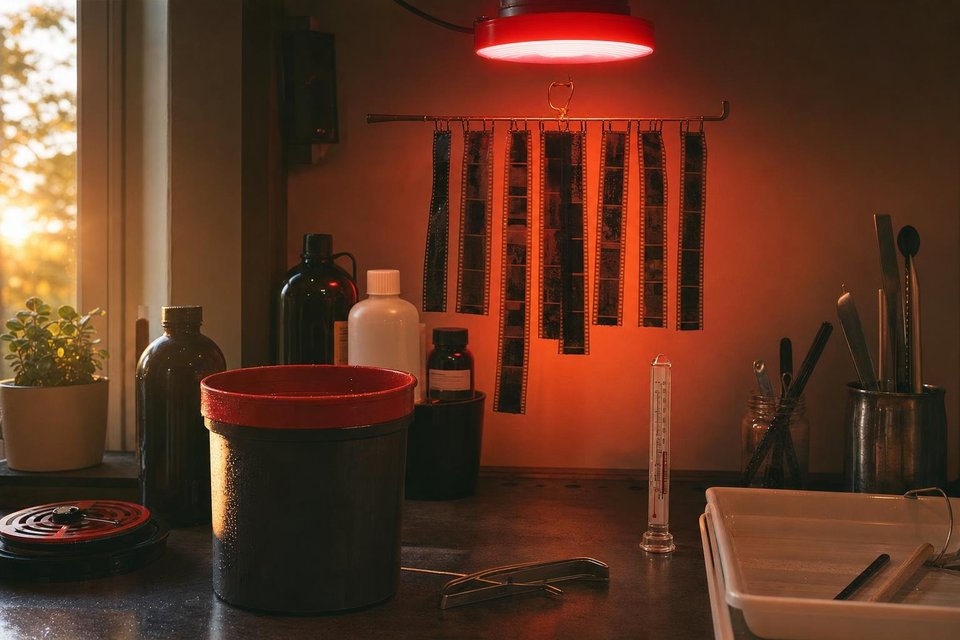
- Wetting agent and dry. A minute in a weak wetting-agent bath, then hang the film with a weight on the bottom clip.
The first developed roll is usually the moment someone decides whether home processing is for them. Taking the film off the reel and holding it to the window, seeing real negatives, is a small thrill that does not wear off quickly.
Fixer can be reused for several rolls and kept in a bottle; developer, especially one-shot concentrates such as Rodinal, is normally mixed fresh and poured away. Used fixer carries silver and should go to a photographic waste collection or a local recycling point rather than down the drain.
Stand development for uneven pinhole exposures
Pinhole photographers have a particular reason to like stand development. In a very dilute developer with almost no agitation, the developer in contact with the densest parts of the negative exhausts quickly, while in thin areas it keeps working. Highlights are held back and shadows keep developing, so the range of densities on a roll narrows. Rolls exposed with the tables in the exposure guides for Zero Image cameras are usually even enough for normal development; it is the guessed rolls, from home-made boxes or unfamiliar light, that benefit most from standing.
That makes it a good match for a pinhole roll with exposures guessed across very different light. A frame exposed a stop too long and one exposed a stop too short come out closer together than they would with normal processing. The method has a price. With no agitation, by-products can sink and leave streaks below the sprocket holes or along the edges of the frame, and grain tends to be more visible. Some people add a single gentle agitation halfway through to reduce the risk.
A dilute developer with gentle agitation for the first minute and once more at the halfway point gives much of the evening-out effect with fewer streaks. It is a safer first experiment than a full hour of standing with no movement at all.
Paper negatives in trays
Many pinhole cameras, from tins to the wooden boxes in the pinhole camera guide, use photographic paper rather than film. Paper is slow, around ISO 3 to 6, but it can be handled under a red safelight and developed in open trays, which turns developing into something visible. The picture rises out of the white sheet in the developer, as a negative.
A typical sequence uses paper developer such as Ilford Multigrade at its normal dilution of 1+9, for around a minute for resin-coated paper; then stop bath, fixer and a wash. Fibre paper needs longer in every bath and a much longer wash. Multigrade paper is sensitive to blue and green light, so a pinhole camera loaded with it can have a sky that comes out solid black on the negative. Pre-flashing the paper, or using a yellow filter over the pinhole, eases the contrast.
A paper negative becomes a positive by contact printing onto another sheet of paper, face to face under glass, or by scanning and inverting it. Both routes are covered in more depth in the article on pinhole cyanotypes, which uses paper negatives as its starting point.
Colour at home with C-41
Colour negative film can be developed at home with a C-41 kit, but the process is stricter. The developer works at about 38 °C and tolerates only small deviations, usually given as a few tenths of a degree. Most home colour developers use a water bath, a sous-vide heater or a dedicated processor to hold that temperature, and preheat the tank and bottles before starting.
| Black and white | C-41 colour | |
|---|---|---|
| Developer temperature | 20 °C, a degree either way tolerated with adjusted time | About 38 °C, held within a few tenths |
| Development time adjustable per roll | Yes, freely | Only within narrow limits |
| Stand development possible | Yes | No |
| Chemistry life once mixed | Fixer lasts for many rolls; one-shot developers mixed fresh | A kit has a set capacity and weakens over weeks |
Results from a careful home run are often indistinguishable from a lab’s. A colour cast, or slightly thin negatives from a kit near the end of its life, are the usual problems. For anyone shooting a little colour among a lot of black and white, a lab may still be the practical answer, at least until the black-and-white side feels routine.
Scanning the negatives
Once dry, negatives can be printed in a darkroom, but most are now scanned. A flatbed scanner with a film holder handles 120 and paper negatives well. A digital camera on a copy stand with a macro lens and a light panel is faster and often sharper, and needs only a holder that keeps the film flat.
A soft pinhole negative needs a clean, even scan far more than it needs maximum resolution.
Dust shows plainly on a scan of a pinhole negative because the image has so few sharp details to hide it. Clean the light panel and the film holder, use a blower on the film, and hang film to dry in a bathroom after running a hot shower, which settles the dust in the air.
Self-built cameras, odd formats
Developing at home also frees the choice of camera. A self-built box can use whatever material is easiest: 120 roll film, sheets of 4×5 film cut to fit, strips of 35 mm, or plain paper. A lab expects standard formats; a home tank and a set of trays accept nearly anything. Sheet film can be developed in a tray under total darkness, or in a tank with a sheet-film holder.
A pinhole camera built around a format no lab will touch, such as a curved strip of paper in a can or a long panoramic length of 35 mm, depends entirely on home processing. The same freedom applies to instant film in a pinhole camera, which needs no chemistry at all, but for anything else the tank on the kitchen counter is where unusual cameras become possible.

Frequently Asked Questions
Is a darkroom needed to develop film at home?
Not for film. A changing bag gives the darkness needed to load the reel into a daylight tank, and every step after that happens with the lights on, at a kitchen sink or in a bathroom. A darkroom or a properly blacked-out room only becomes necessary for photographic paper, which is handled in open trays under a safelight, and for printing negatives with an enlarger.
How much does a basic home developing kit cost?
A starter set of a tank with reels, a changing bag, a thermometer, measuring cylinders, bottles and clips usually costs somewhere between the price of a few rolls of film and a modest lens, depending on whether it is bought new or second hand. Chemistry for black and white then costs well under the price of lab developing per roll, and the savings grow with every film.
Can colour negative film be developed at home?
Yes, with a C-41 kit, though it is less forgiving than black and white. The developer works at around 38 °C and needs that temperature held closely, usually with a water bath around the tank and the bottles. Kits are sold with a limited capacity and shelf life once mixed. Many home developers process colour in batches of several rolls to make the most of a kit before it weakens.
What is the best developer for uneven pinhole exposures?
A dilute developer used for stand development is the common answer. Highly diluted Rodinal is the classic choice, left with little or no agitation so that the developer exhausts in dense areas while it keeps working in thin ones. That narrows the gap between an overexposed and an underexposed frame on the same roll. The method can leave streaks and uneven edges, so it is worth testing on a less important roll first.
How should paper negatives be dried?
Resin-coated paper dries flat and quickly on a line or a rack, often within half an hour at room temperature. Fibre paper curls badly as it dries, so it is laid face down on clean fibreglass screens or pressed between blotting paper and then under weight. A brief rinse in wetting agent helps both types dry without marks. Heat can be used for resin-coated paper but should stay gentle.