Camera
Miru 35mm Pinhole Camera: First Impressions of Handling, Winding and Results
A small waxed-wood 35mm pinhole camera from Miru Cameras: handling, loading, winding by counted turns, steadying it without a tripod mount and first results.
Plenty of pinhole photographers quietly avoid 35 mm. The negative is small, a pinhole image is soft to begin with, and getting through thirty-six frames at exposures of several seconds each can take weeks. The Miru Cameras 35mm pinhole camera makes a decent case for the format anyway, mostly by being small enough to come everywhere.
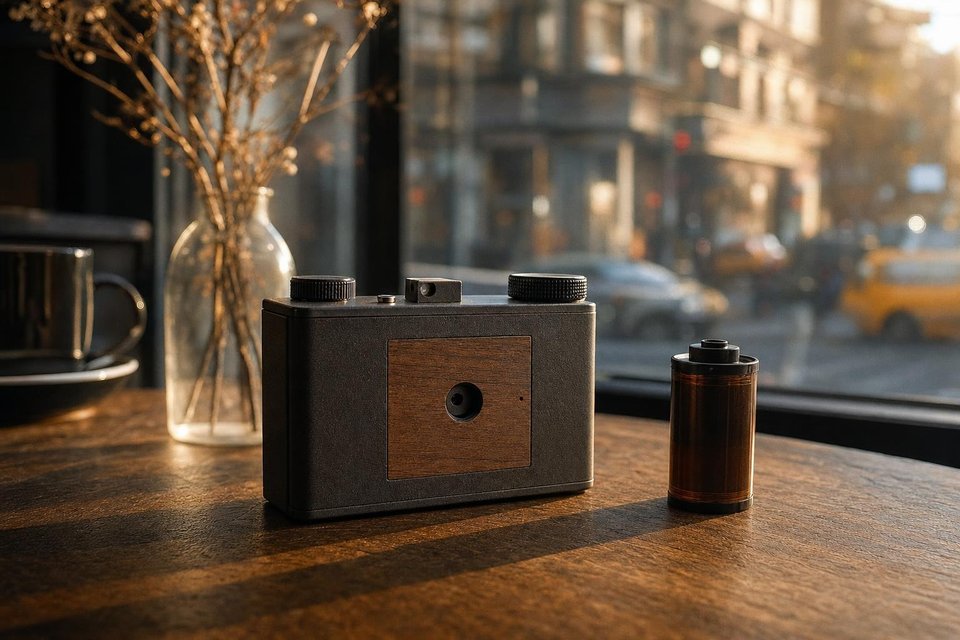
It is a compact wooden box, light in the hand and finished with wax rather than lacquer, built around a single roll of 35 mm film and a second cassette that serves as the take-up. The camera arrives well packaged, with written instructions that are clearer and more thorough than those of many commercial cameras costing far more.
Build and finish
The wood is light and the finish is soft to the touch, closer to an oiled tool handle than to a polished cabinet. There is no plastic anywhere visible and very little hardware. That keeps the weight down, and it also means there is little to break.
Loading is straightforward. The back opens fully, the fresh cassette drops into one chamber and the film leader feeds across the gate into the supplied take-up cassette on the other side. Unloading is just as simple, since the exposed film ends up wound into the take-up cassette, ready for the lab.
- Light, small and pocketable, with no protruding parts to snag in a bag
- Waxed wood finish that ages well with handling
- Marks on the top and on the take-up cassette for counting turns
- Clear printed instructions included in the box
- No tripod socket, so every exposure needs a resting surface
Winding by counted turns
There is no frame counter and no sprocket wheel. Instead, the top of the body and the supplied take-up cassette both carry small marks, so each turn of the key can be counted against the reference.
The recommended advance is one full turn per frame. Winding one and a half turns feels safer the first time, to avoid overlapping frames, but it wastes film and leaves gaps wide enough to lose several pictures by the end of the roll. One turn is enough, because the film thickens on the take-up spool as the roll goes on and every turn moves a little more film than the last.
The winding can feel stiff at first. It loosens with use, and a light touch with the camera held flat on a table makes it easier than winding in mid-air.
Steadying a camera without a tripod mount
The lack of a tripod socket is the one real compromise. A pinhole camera at around f/150 to f/200 needs exposures of a second or more in anything but full sun, and no one holds still for that long.
The answer is to treat the camera as a small object to be placed rather than held. Café tables, window ledges, park benches and the tops of bins all work. Pressing the camera down lightly with one finger while opening the shutter with another keeps it from shifting. A small beanbag or a folded glove deals with uneven stone.
Wait two seconds after touching the shutter before starting the count. The camera settles, any shake from the hand dies away, and the extra time is a rounding error at pinhole exposures.
Hand-held shots in bright light sometimes work and often show a faint double outline. Treat them as experiments rather than as the norm.
35 mm against 120 for pinhole
The format question shapes how this camera gets used. A 35 mm frame is a fraction of the size of a medium format one, so every bit of pinhole softness is enlarged more in the print. The table puts numbers on it.
| Format | Frame | Area against 35 mm | Frames per roll |
|---|---|---|---|
| 35 mm | 24 × 36 mm | 1× | 36 |
| 120, 6×6 | 56 × 56 mm | 3.6× | 12 |
| 120, 6×9 | 56 × 84 mm | 5.4× | 8 |
That difference explains why many people find 35 mm pinhole images less sharp than medium format ones made with similar cameras. It also explains the appeal. Film is cheaper per frame, almost every lab can process it, and a body built around a 35 mm cassette can be very small indeed. For a camera that lives in a coat pocket, the smaller negative is a reasonable price.
Finishing a roll is the other issue. Thirty-six exposures at pinhole speeds take time, and many 35 mm pinhole cameras end up sitting with a half-shot roll inside for months. The Miru avoids that fate largely through its size. It comes along by default, so the frames get used.
First results
The first roll through the camera showed no light leaks, with a little tape over the seams as a precaution, and an even, gentle fall-off towards the corners. Pictures made on a table or a wall were as sharp as a pinhole picture gets; the few made by hand showed the expected blur.
Exposure needs no special treatment. Meter the scene at f/22 with a phone app, multiply by the factor for the camera’s f-number, and add reciprocity time on film once the result passes a second. On a bright afternoon that lands somewhere around a second; in the shade of a narrow street it stretches to ten or twenty. A notebook with the frame number, the time and the light makes the second roll far more consistent than the first.
Home scans can undersell a camera like this badly. A quick scan with dust, poor focus on the scanner and flat levels makes any pinhole negative look worse than it is, so it is fairer to judge it from a lab scan. Colour negative film such as Kodak Portra suits it well, with enough latitude to cover the usual guesswork in exposure.
Who it suits
Anyone who already owns a medium format pinhole camera and wants something for daily wandering will get the most from it. It is a good second camera rather than a first one, since the counting, the steadying and the small negative all reward a little experience. Beginners are probably better served by a sturdier box such as the Ondu or a kit like the Viddy, and the pinhole camera guide explains how the f-number and exposure work for any of them.
The waxed finish picks up a patina quickly. After a few weeks in a bag it looks less like a new product and more like a well-used tool, which suits it.

Frequently Asked Questions
How many turns should the Miru be wound between frames?
The maker recommends one full turn of the take-up cassette per frame, and the marks on the top of the body and on the supplied cassette make that easy to count. Winding one and a half turns is a common beginner's habit and simply wastes film, leaving wide gaps between frames. One turn gives tight spacing early on, and the spacing grows naturally as the film builds up on the take-up spool.
Does the Miru need tape against light leaks?
Probably not. The body closes well, and a first roll shot with a few strips of tape as insurance showed no leaks at all. If tape is used as a precaution, low-tack masking tape is the safer choice, and it should be peeled slowly, because ordinary tape can lift the wax finish off the wood when the camera is opened to unload. A torch test in a dark room is a quicker check.
Can the Miru be used on a tripod?
There is no tripod socket, which is a fair trade for the small size. The camera is meant to be set down on a firm surface during the exposure: a wall, a railing, a table or a step. A small beanbag helps on uneven ground. Hand-holding works only for very short exposures in strong light, and even then a slight blur is likely.
Is 35 mm a good format for pinhole work?
It is cheaper and easier to process than 120, and almost any lab can develop and scan it. The drawback is the small negative, which shows the softness of a pinhole image more than a medium format frame does. Thirty-six frames also take a while to finish at pinhole speeds. For a camera carried every day, those trade-offs matter less than the convenience.