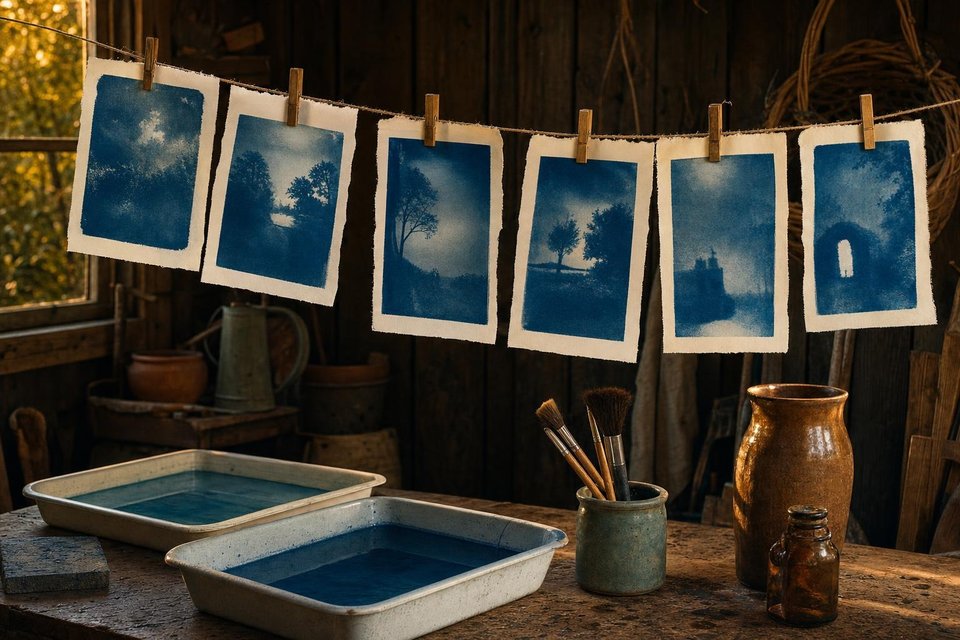
Process
Pinhole Cyanotypes: From Paper Negatives to Prussian Blue Prints
Pinhole cyanotypes two ways: contact prints from paper negatives, or cyanotype paper exposed in the camera. Chemistry, UV, exposure and washing.
The blue comes first. Before anyone thinks about pinholes or paper grades, a cyanotype is that deep Prussian blue, the colour of old architectural plans and of the seaweed plates Anna Atkins printed in the 1840s. Sir John Herschel described the process in 1842, and for most of the following century it was the cheapest way to copy anything flat onto paper.
Pinhole photography and cyanotype share a temperament. Both are slow, both work with sunlight and simple materials, and both reward patience more than equipment. A pinhole cyanotype can be made in two quite different ways, and the choice between them shapes everything else, from the camera to the time of year.
Two routes to a pinhole cyanotype
The first route is indirect. The pinhole camera makes a negative on photo paper or sheet film in the usual way, and that negative is then laid on a sheet of cyanotype paper and printed in the sun. The second is direct: the cyanotype paper goes into the camera itself and the pinhole projects the scene straight onto the sensitised sheet.
| Paper negative, then contact print | Cyanotype paper in the camera | |
|---|---|---|
| Camera exposure | Seconds to minutes | Hours, often a whole sunny day |
| Darkroom needed | Yes, for the negative | No |
| Image on the paper | Positive, from a negative | Negative: bright sky dark blue, shadows pale |
| Prints per exposure | As many as you like | One |
| Detail | Good, limited by the paper negative | Soft, grainy with paper texture |
Most people start with the indirect method because it gives a recognisable positive picture and keeps the camera exposure in a normal range. The direct method is the stranger and more experimental of the two, and it makes sense only on long bright days.
The chemistry
Cyanotype is an iron process. Light reduces ferric iron in the coating to ferrous iron, which then reacts with ferricyanide to form insoluble Prussian blue. Unexposed areas stay soluble and wash away in plain water, which is why no fixer is needed.
Mix the two solutions under weak tungsten light or in a dim room, brush them onto a heavy, acid-free watercolour paper and let the sheet dry in the dark. A single even coat with a hake brush or a glass rod is enough. Pools and streaks will print as darker blue. Coated paper keeps for days to a few weeks if it stays dry and dark, though it gives the cleanest whites when fresh.
A later variant, often called the new cyanotype and associated with the chemist Mike Ware, uses ferric ammonium oxalate instead of the citrate and is noticeably faster with deeper blues. It is a little more fussy to mix and the oxalate is more toxic, so the classic two-part version remains the usual starting point.
Light: why the sun does the work
Cyanotype responds almost only to ultraviolet and the deep violet end of the spectrum. Window glass blocks much of the useful UV, ordinary household bulbs give off very little and a phone screen none at all. Direct sun is the cheapest source, a UV lamp or a nail-curing box the most repeatable.
That sensitivity is the whole difficulty of the direct method. A pinhole working at f/150 to f/250 passes only a tiny fraction of the light a contact frame sees, so a sheet that prints in ten minutes under a negative may need eight hours or more inside the camera. Solargraphers, who leave paper in a can for months, use the same principle with ordinary photo paper; cyanotype paper is slower, so it suits a single day rather than a season.
Making the paper negative
For the indirect route the camera holds ordinary resin-coated or fibre photo paper. Paper is slow, roughly ISO 3 to 6, so a pinhole box at f/200 in full sun wants an exposure of the order of half a minute to a minute, and much longer in shade. The exposure guides for Zero Image cameras give tables that adapt easily to paper.
- Expose and develop the paper negative. Normal paper developer, stop and fix, then wash and dry flat.
- Make it more transparent. Rub a little mineral oil or melted wax into the back of a fibre negative; it lets more UV through and shortens the print time.
- Coat the cyanotype paper a little larger than the negative and let it dry fully in the dark.
- Sandwich and expose. Negative face down on the coated side, glass on top, in sun for roughly 5 to 20 minutes depending on season and thickness.
- Wash. Running water for about five minutes, until the water leaves the paper clear and the highlights turn white.
Resin-coated paper does not take oil and lets less UV through, so print times climb sharply. Many printers scan the paper negative instead, invert it, adjust the curve and print it on transparency film as a digital negative. That also allows the print to be larger than the camera’s paper.
Cyanotype paper in the camera
A cyanotype pinhole camera is simply any light-tight box with a hole, as described in the pinhole camera guide. Load the coated sheet exactly as you would load photo paper, with the coating facing the pinhole. Because cyanotype is a printing-out process, the image appears on the paper during the exposure, and that is its great practical advantage: there is no need to guess. Open the back in subdued light after a few hours and look. A faint blue picture means it needs longer. A strong blue with greyish-bronze shadows means it is nearly there.
The result is a negative on the paper itself. Bright sky prints dark blue and shadows stay pale, so a sunny landscape looks like a moonlit one in reverse. Some photographers keep it that way; others scan the sheet and invert it.
The direct method rewards a shorter camera. A 50 mm deep box at about f/190 needs well under half the time of a 4×5 box at f/335, at the cost of a smaller picture. Wide-angle boxes also gather the sky, which carries most of the UV.
Wind is the enemy over several hours. Tape the camera down or put a stone on it, and turn the box so the sun does not shine straight into the hole for the whole day, or it will burn a smear across the sheet.
Washing, toning and keeping
Plain cold water clears a cyanotype. A splash of household hydrogen peroxide in the last bath darkens the blue at once, though the same change happens on its own over a day or two of drying. A weak vinegar rinse can help with hard water. Avoid washing powders with phosphates and any alkaline bath, which bleach the image.
Toning turns the blue into other colours. Tea, coffee and tannic acid baths take the print towards brown, purple or black after a brief bleach in very dilute washing soda. Results vary from paper to paper, so every toning session starts with test strips cut from the same sheet.
The image appears during the exposure, so the direct method needs patience but very little guessing.
Store finished prints in neutral, unbuffered sleeves. Cyanotypes last well in a drawer, yet displayed in strong light for months they can lose density, then regain much of it after a rest in the dark.
Choosing subjects for blue
Cyanotype flatters simple forms: rooftops against the sky, piers, trees in silhouette, the edge of the sea. Fine texture disappears into the paper, so subjects that depend on detail look disappointing. Portraits are possible on the indirect route with short paper-negative exposures, though a pinhole portrait has its own problems, set out in the piece on pinhole portraits.
Season matters more than anything else in a pinhole cyanotype, in the way temperature rules the development of peel-apart instant film in a pinhole camera. A June afternoon in northern Europe may carry more UV in an hour than a December day does from dawn to dusk. If an in-camera sheet stays almost blank after a winter day, the coating is probably fine and the sky simply did not deliver.
Frequently Asked Questions
What chemicals does a cyanotype need?
Two, mixed in equal parts just before coating. The classic recipe dissolves about 25 g of ferric ammonium citrate (the green form) in 100 ml of water, and about 10 g of potassium ferricyanide in another 100 ml. Each solution keeps for months in a dark bottle; the mixture does not. Ready-made kits and pre-coated paper avoid weighing anything, though they cost more per sheet.
Is cyanotype chemistry dangerous?
It is one of the gentler photographic processes, but it still deserves care. Potassium ferricyanide is low in toxicity as long as it is not mixed with strong acids or heated, which can release harmful gas. Wear gloves, keep food away from the work area, never use kitchen trays and follow the safety sheet that comes with the chemicals. Waste water goes to the drain only where local rules allow it.
Why does a cyanotype sometimes wash out almost completely?
Usually underexposure. A cyanotype changes colour as it is exposed and some of that colour leaves in the wash, so a print that looks right under the lamp is often too light afterwards. Aim for shadows that have turned a bronzed grey-blue before washing. Thin coating, very fresh paper that was still damp, or an alkaline paper can also weaken the blue.
Can a cyanotype be made from a film negative?
Yes, as a contact print, but small film is a poor match. Cyanotype has no enlarger stage, so the print is the size of the negative. A 35 mm frame gives a print the size of a postage stamp. Larger pinhole negatives work much better: 4×5 inch sheet film, paper negatives from a box camera, or a digital negative printed on transparency film at the size you want.
How do cyanotypes fade, and can they recover?
The Prussian blue pigment is stable in light for most uses, but alkaline conditions attack it and turn it pale or yellowish. Buffered mount board, phosphate washing powders and some tap water can do this. A print that has faded in light on display often darkens again after a rest in the dark, which is an unusual and well-documented trait of the process.