Guide
Pinhole Camera Guide: How It Works, How to Build One and Which Kind to Buy
How a pinhole camera works, what each part does, how focal length sets the angle of view, and how to build or choose a wooden, plastic or large format camera.
A pinhole camera has fewer parts than a kitchen drawer: a box that keeps light out, a hole small enough to form a picture, something to cover that hole and a surface at the back that records what arrives. Everything else on a commercial model, from brass fittings to engraved sight lines, makes that box nicer to use without changing what it does.
This guide follows the light from the scene to the film, then turns to the practical side: how big the box should be, how to build one at a table in an evening, and what separates a wooden camera costing a few hundred pounds from a plastic one costing a few dozen. The large format section near the end covers sheet film, paper negatives and the special pleasure of a print the same size as the negative.
How It Works: Light Through a Single Point
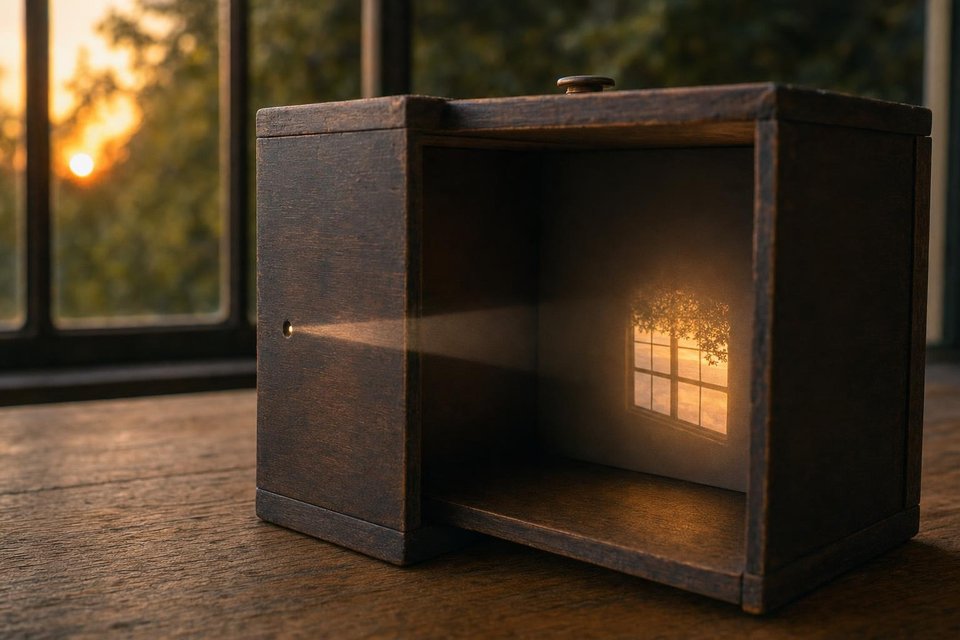
Light leaves every point of a lit scene in all directions. A lens gathers a cone of that light and bends it back to a point. A pinhole does no bending at all. It simply blocks every ray except the thin bundle that happens to pass through the hole, and because that bundle travels in a straight line, the top of a tree lands at the bottom of the film and the left edge of a building lands on the right. The picture inside the box is upside down and reversed, exactly as Ibn al-Haytham described in his Book of Optics in the early eleventh century.
That straight-line rule is how it works in every pinhole camera, from a matchbox to a 4×5 box. There is no focusing distance, so a stone at your feet and a lighthouse on the horizon are rendered with the same modest sharpness. There is also no limit to depth of field, which is why pinhole pictures of close foregrounds look so odd and so pleasing at once.
The size of the hole sets a compromise. A large hole lets each point of the scene spread into a disc, and the picture goes mushy. A very small hole runs into diffraction, where light bends around the edge of the opening and blurs the image again from the other side. Between the two sits an optimum that grows with the square root of the distance to the film. The rule used on this site, 0.0366 times the square root of the focal length in millimetres, gives about 0.26 mm for a 50 mm deep box.
Distance to the film also decides how much of the scene fits on it. Short boxes see wide, long boxes see narrow, and the f-number follows directly from dividing that distance by the hole. Knowing how a pinhole camera works at this level is enough to design one from scratch.
| Focal length | Format | Diagonal angle | Pinhole | f-number |
|---|---|---|---|---|
| 25 mm | 35 mm (24×36) | 82° | 0.18 mm | f/137 |
| 40 mm | 35 mm (24×36) | 57° | 0.23 mm | f/173 |
| 50 mm | 6×6 cm | 77° | 0.26 mm | f/193 |
| 75 mm | 6×9 cm | 68° | 0.32 mm | f/237 |
| 100 mm | 4×5 inch | 78° | 0.37 mm | f/273 |
| 150 mm | 4×5 inch | 57° | 0.45 mm | f/335 |
Anatomy of the Box
Every part of a pinhole camera answers one of four questions: where does the light come in, how is it stopped, where does it land and how does the photographer know what is in the frame.
The pinhole plate is usually a scrap of thin brass or aluminium, often no thicker than a drinks can, mounted over a larger opening in the front panel. Thin metal matters because a thick plate turns the hole into a short tunnel that clips the edges of the picture. The shutter can be a sliding panel, a pivoting flap, a magnet-held cover or a strip of black tape. On long exposures nothing more elaborate is needed. On exposures under a second, any shake from opening and closing shows, which is why some makers fit a cable release.
At the back sits the film plane. Roll film cameras carry the film across a flat or slightly curved gate between two spools; sheet film cameras accept a standard film holder with a dark slide. Because light reaching the corners travels further and arrives at a steeper angle, a flat plane loses brightness towards the edges in proportion to the fourth power of the cosine of that angle. At 40 degrees off axis that adds up to roughly one and a half stops. Curving the film plane evens it out and changes the geometry of the picture, which is the starting point of the anamorphic cameras covered in anamorphic photography with a curved wooden camera.
Finally there is aiming. Without a viewfinder, makers engrave or paint lines on the top and sides of the body that show the edges of the frame. A home-built camera can borrow the same trick: two pencil lines drawn from the pinhole to each corner of the film, carried over onto the outside of the box.
How to Build a Pinhole Camera at the Kitchen Table
The first camera does not need to be beautiful. It needs to be light-tight and to hold film flat at a known distance from a clean hole. A biscuit tin, a matchbox or a shoebox painted black inside will all do, and a dozen spoiled frames teach more than any diagram. Building one also takes the mystery out of every commercial model.
- Choose the format first. Decide between 35 mm film, 120 roll film or single sheets of photo paper, because the box must fit what it holds.
- Fix the focal length. Measure from where the hole will sit to the film surface. Shorter means wider and faster; 40 to 50 mm is a comfortable middle for roll film.
- Make the hole. Press a fine sewing needle into a square of thin aluminium on a piece of card, turn it, sand the burr lightly with very fine paper, and press again from the other side.
- Measure it. Scan the plate on a flatbed at the highest resolution beside a ruler, or check it under a magnifier. Write the diameter and f-number on the camera.
- Seal the box. Paint the inside matt black and cover every seam with black tape. A dark room and a torch shone from inside show leaks quickly.
- Add a shutter and sight lines. A hinged card flap or a strip of tape is enough. Draw the frame edges on the outside, then shoot a test roll in daylight.
Paper negatives make the cheapest test medium. Ordinary multigrade paper behaves roughly like a film of ISO 3 to 6, it can be developed under a red safelight in a tray, and the negative can be contact printed or scanned and inverted. Once the box gives clean frames on paper, roll film is a small step.
Those who want something sturdier without starting from wood have good options. Printed plans exist for 35 mm and medium format bodies, and the Easy 35 printed camera shows what a home 3D printer can produce. Cardboard and paper kits go together over an evening and give surprisingly clean negatives.
An oversized hole is the most common fault on a first build. If the negatives look evenly soft from centre to edge and the camera was on a support, make a new plate with a finer needle before changing anything else.
Which Pinhole Camera to Buy
Ready-made cameras fall into three broad families, and the choice says more about how a photographer works than about image quality.
Wooden cameras are the ones people photograph on their own. Zero Image in Hong Kong has made teak and brass models for many years, in sizes from 35 mm to 4×5 inch sheet film, and they hold their value well. Ondu in Slovenia builds in wood held together with magnets; a full Ondu pinhole camera review covers how that design handles in practice. Small workshops such as RealitySoSubtle add multiple pinholes and engraved sight lines, discussed in the piece on 4×5 pinhole photography.
Plastic bodies cost far less. The Holga 120 WPC gives a wide 6×12 cm frame on roll film, and the Harman Titan takes 4×5 sheet film or paper negatives. Both are light, both are hard to damage and both produce work that sits comfortably next to anything made in wood.
Then there are curiosities. Instant pinhole cameras built around integral film, panoramic metal bodies with interchangeable pinholes, tins with holes punched in them. Any of these makes a good second camera once the basics are second nature.
The best pinhole camera design is usually the one that gets carried. A small box on a daily walk beats a beautiful one left on the shelf.
Medium and Large Format Pinhole
Pinhole pictures gain more from a large negative than lens pictures do. The pinhole sets a fixed amount of blur, measured in fractions of a millimetre, and a bigger negative needs less enlargement, so that blur stays small on the print. A 6×9 cm frame from roll film already looks noticeably cleaner than 35 mm, and a 4×5 inch sheet printed by contact can look startling.
Large format also brings practical advantages. Each sheet is developed on its own, so exposure can be adjusted frame by frame. Paper negatives cost very little in that size. The trade-off is weight and a slower rhythm: a tripod, a bag of film holders and perhaps four or five pictures in an afternoon. Beyond 4×5 sit 8×10 boxes and home-made cameras built around whole sheets of photo paper, where the contact print is the size of a small window.
Mistakes Worth Avoiding
Most failed rolls from a new pinhole camera come from a short list of causes, and nearly all of them can be checked before loading film.
- Light leaks along seams or around the film door, shown as streaks or fogged edges.
- A burr left inside the hole, giving a flare or a soft halo on bright subjects.
- Forgetting reciprocity on film exposures longer than about a second.
- Holding the camera by hand for a half-second exposure.
- Winding the wrong number of turns, so frames overlap or leave wide gaps.
- Pointing straight at the sun with a large hole, which can flare across the whole frame.
Exposure deserves its own page. The arithmetic for turning a meter reading into a pinhole time, including the correction for film, is set out in the Zero Image exposure guides, and the full learning path sits on the guides page. Anyone still deciding what to build or buy can start with a matchbox and a roll of film this weekend: the box will show how a pinhole camera works more quickly than any amount of reading.

Frequently Asked Questions
Do pinhole photographs ever look sharp?
They never match a good lens, but a correctly sized hole gives a surprisingly crisp result, especially on larger film. A 4x5 sheet enlarged only a little, or printed by contact, can look almost lens-made in the centre. The softness that people associate with pinhole work comes mostly from oversized holes, camera shake during long exposures and heavy enlargement of small 35 mm frames.
What film should a first pinhole camera use?
Medium format black-and-white film with a forgiving latitude, such as Ilford HP5 Plus, is the easiest start. It tolerates exposure errors of a stop or two in either direction, it develops in ordinary chemistry and it has a published reciprocity correction. Colour negative film also works well. Slide film and instant film punish mistakes and are better left until the camera's behaviour is known.
Can a digital camera take pinhole pictures?
Yes. A body cap with a small hole drilled in its centre and covered with a pierced piece of thin metal turns an interchangeable-lens camera into a pinhole camera. The short distance to the sensor gives a small hole and a low f-number by pinhole standards. Dust on the sensor shows up clearly at such small apertures, so a clean sensor matters more than usual.
How long does a typical pinhole exposure last?
In bright sun, an f/192 camera loaded with ISO 400 film needs well under a second. On an overcast afternoon it can be several seconds, and indoors by window light a minute or more once reciprocity is applied. The calculator on the exposure page converts any meter reading at f/22 into a pinhole time, with or without the correction for film.