Process
Harman Direct Positive Paper in a Tin Can Pinhole Camera: Exposure and Builds
Harman Direct Positive paper in a tin can pinhole camera: slow speed, pre-flashing for contrast, developing, and building mint-tin and food-can cameras.
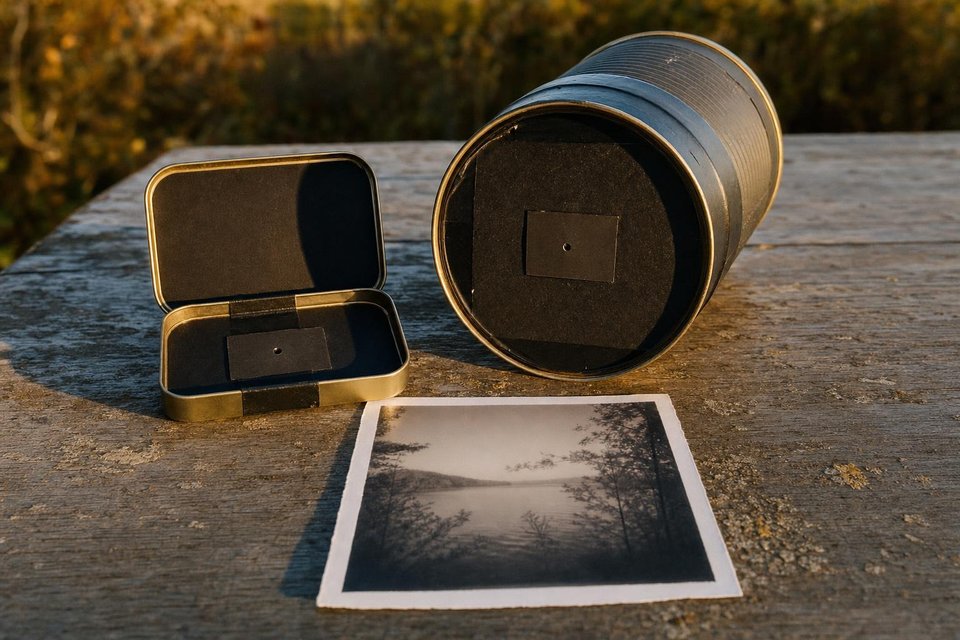
A sheet of paper goes into a tin, the tin sits on a fence post for a minute, and the sheet comes out of the developer as a finished positive picture. No negative, no enlarger, no scanner in between. That directness is what makes Harman Direct Positive paper so popular in pinhole cameras, especially the home-made ones built from mint tins and food cans.
The paper is slow, high in contrast and a little stubborn, and it gives only one picture per sheet. Those are real limitations, and they shape how the cameras are built and used. They also produce prints that no other process quite matches: one-off objects, soft and slightly strange, that went straight from the scene into the hand.
What direct positive paper does
Ordinary photographic paper in a pinhole camera produces a paper negative: dark sky, light shadows, needing a second step to become a picture. Direct positive paper reverses that inside its own emulsion. Light areas of the scene come out light, dark ones dark, from the first development. Harman makes it in fibre-based and resin-coated versions, and it is processed in normal paper chemistry.
The low speed is the first thing to get used to. Ordinary paper in a pinhole camera is already slow; direct positive paper is slower still, so exposures in sunshine run from tens of seconds to a few minutes depending on the size of the camera. In shade or under cloud they stretch much further.
Building tin can and mint-tin cameras
A metal tin makes a nearly perfect pinhole camera body: light-tight, strong, cheap and already a sensible shape. The pinhole is made in a piece of thin brass shim or drinks-can aluminium and taped over a larger hole in the side or lid. The general principles of hole size and placement are set out in the pinhole camera guide.
- Clean and blacken the inside. Remove labels, wash, and paint the inside with matte black paint to kill reflections.
- Drill a hole of about 5 mm in the side or lid, and smooth its edges.
- Make the pinhole in shim or can metal with a fine needle, sanding both sides, and check its diameter against a scanned ruler.
- Fit the pinhole over the hole with black tape, centred.
- Add a shutter: a flap of black tape or card that can be lifted and replaced without moving the tin.
- Test for leaks by loading one sheet of paper, leaving the shutter shut in sun for ten minutes, and developing.
Lids are the weak point. A push-on lid is usually tight enough; a hinged mint-tin lid often needs a strip of black tape around the seam. Rust and dents do no harm as long as the inside stays dark and the paper sits where it should.
Flat or curved: the shape of the picture
A tin offers a choice. The paper can sit flat against the base of a shallow tin, facing the pinhole across the depth, or curl around the inside wall of a cylindrical can, with the pinhole in the opposite side. The two give very different pictures.
Flat paper in a mint tin gives a conventional, if extremely wide, picture with dark corners. Curved paper in a food can produces a strong bend: horizons arch, verticals near the edges lean outwards and the scene seems to wrap around the viewer. The curve also keeps exposure more even across the sheet than a flat back would at the same angle of view, because the edges of the paper sit closer to the pinhole.
| Camera | Pinhole to paper | Pinhole diameter | f-number | Sunny exposure |
|---|---|---|---|---|
| Mint tin, flat paper | 20 mm | 0.16 mm | f/122 | ≈ 19 s |
| Food can, curved paper | 75 mm | 0.32 mm | f/237 | ≈ 73 s |
| Large can, curved paper | 100 mm | 0.37 mm | f/273 | ≈ 97 s |
| Paint tin, curved paper | 150 mm | 0.45 mm | f/335 | ≈ 146 s |
The pinhole diameters come from the usual rule of 0.0366 times the square root of the distance to the paper. The exposures start from the sunny rule of f/16 at 1/ISO, scaled to each f-number; long exposures on paper lose speed, so real times are usually longer, and the first sheets in any new tin are test sheets. For curved paper the distance in the table is measured straight across the can to the centre of the sheet.
Exposing and pre-flashing
Direct positive paper is high in contrast. In a sunlit scene the shadows block into solid black and bright skies burn out, leaving a picture with little in between. Pre-flashing is the standard remedy. The whole sheet receives a short, even exposure to dim light before it is loaded, a little less than enough to show any tone on its own. That small dose lifts the deepest shadows and lowers the contrast of the picture that follows.
Cut a sheet into strips and give each a different pre-flash under a weak, diffused light at a fixed distance, then develop them without any camera exposure. The longest flash that still leaves the paper looking fully black is the starting point.
Choose scenes with soft, even light for the first attempts: overcast days, open shade, buildings in flat afternoon light. A low sun straight at the pinhole produces flare and a blank hole in the sky. A tin camera on a wall on a dull day, left for several minutes, often gives a better first direct positive than one in brilliant sun.
Developing in the tray
Development happens in ordinary paper chemistry under a safelight: developer, stop bath, fixer and a wash, as with any print. A standard paper developer at its usual dilution is the normal choice, and Harman’s data sheet gives the current recommended times. The picture appears as a positive from the start, which is a pleasant surprise for anyone used to paper negatives. The trays, safelight and wash routine are the same as for paper negatives, described in the guide to developing pinhole negatives at home.
Judging the result takes some practice, because the usual reading of a print is turned around. A sheet that comes out too dark overall was given too little light, and one that looks pale and washed out was overexposed or fogged. Mid-grey skies with detail in the clouds usually mean the exposure was close. Note every sheet’s time and pre-flash on its back in pencil before it goes into the tray.
A curved sheet from a food can turns a straight street into a gentle arch, and nothing on the print looks quite flat.
Resin-coated sheets dry flat and quickly. Fibre sheets curl and need pressing, but they tone well and have a deeper surface that suits the soft pinhole image. Because each print is unique, many photographers scan the sheet as soon as it is dry, flipping the scan to correct the mirror image if they want the scene the right way round.
Cardboard cameras and other bodies
Tins are not the only option. Cardboard boxes, shoeboxes and cereal packets make perfectly good cameras for paper, as long as every seam is taped and the inside is painted black. Cardboard is easier to cut than metal, so building a camera with a curved back or a long box for a narrower view takes minutes. It is less durable, and a damp day can warp it. For a slow, contrasty material like direct positive paper, though, the body matters far less than the patience to make a few test sheets. The same handmade spirit runs through cyanotypes from paper negatives and the peel-apart experiments in instant film through a pinhole.

Frequently Asked Questions
Why is a direct positive picture reversed left to right?
A pinhole projects an image that is upside down and mirrored, and an ordinary negative is turned the right way round when it is printed face to face or scanned. A direct positive print is the sheet that sat in the camera, so nothing turns it back. Text in the scene reads backwards. A scan can be flipped, and some photographers simply accept the mirror image as part of the process.
Can Harman Direct Positive paper be handled under a safelight?
Yes, under the safelight recommended on the packet and in Harman's data sheet, kept at a sensible distance and used briefly. Loading cameras and developing in open trays both happen under that light. Because the paper is slow and the positive process reverses everything, light fog does not darken it as with ordinary paper; it lightens and flattens the shadows, which can be hard to spot until several sheets look the same.
How big a tin works for a pinhole camera?
Almost any size works, from a mint tin around 20 mm deep to a paint tin of 150 mm or more. Shallow tins give very wide pictures and short exposures; deep ones give narrower views and much longer exposures. A food can of about 75 mm diameter is a comfortable first size, because a sheet of paper cut to fit its inside wall is easy to handle and the exposure stays near a minute in sun.
What developer does direct positive paper need?
A standard paper developer at its normal dilution, the same one used for ordinary prints. After that the sheet goes through stop bath and fixer and is washed as usual, so no special chemistry is needed. The reversal happens inside the emulsion. Development times are typically a little longer than for ordinary resin-coated paper; Harman's data sheet gives the current recommendation for each version of the paper.
Does pre-flashing really reduce contrast on direct positive paper?
It does, and it is the usual cure for the strong contrast of the paper in a pinhole camera. A short, even exposure to dim light, given to the whole sheet before it goes into the camera, slightly fogs the emulsion. On a direct positive material that holds back the deepest shadows from blocking up. The right amount is found with a test strip, flashing sections for increasing times and comparing them.