DIY
Easy 35 Pinhole Camera: Printing and Assembling a Free 3D Printed 35mm Design
The Easy 35 from Pinhole Printed is a free, one-piece 3D printed 35mm pinhole camera. How it works, print settings that keep light out, and assembly.
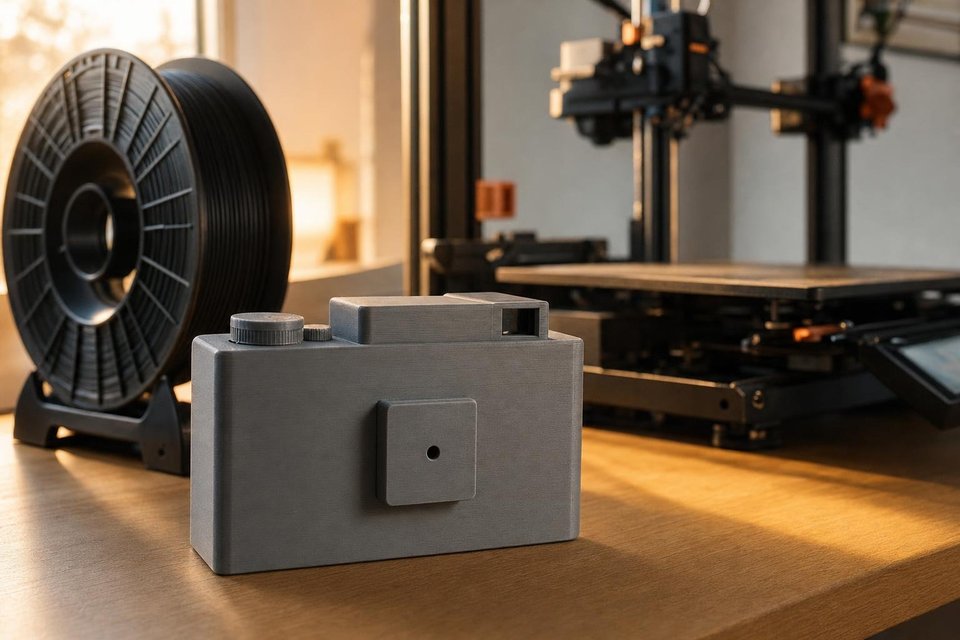
The Easy 35 is a 35 mm pinhole camera that comes out of a 3D printer almost finished. Its body prints as one piece, with the film chambers, the film rails, the internal light baffles and the pinhole mount all moulded together. Add a pinhole, a rubber band to hold the top on and a strip of black tape as a shutter, and it is ready to load.
It comes from Pinhole Printed, a project that began with a successfully funded crowdfunding campaign in 2013 for a 3D printed pinhole camera. The Easy 35 followed in 2015 with a simpler aim: a camera that anyone with access to a printer could make quickly and cheaply, for photographers and equally for teachers showing children how photography works.
Why one piece matters
A conventional camera body is assembled from parts because moulds and machining cannot produce hollow chambers, curved rails and folded baffles in a single block. A printer builds layer by layer and does not care. That freedom is what makes the Easy 35 possible, and it is also why the design has so few failure points: fewer joins mean fewer seams for light to creep through.
It prints in roughly half the time of the project’s earlier Flyer 6×6, and several bodies can share a print bed. For a class or a workshop that is the real advantage, because a whole set of cameras can be ready by the next morning.
Print settings that keep light out
A 3D printed pinhole camera succeeds or fails on light-tightness. Plastic that looks solid can pass a surprising amount of light, especially pale filament or thin walls held up to bright sun. The settings below are sensible starting points rather than fixed rules, since every printer behaves a little differently.
| Setting | Suggestion | Reason |
|---|---|---|
| Filament | Black PLA or ABS, matte if possible | Blocks light, cuts internal reflection |
| Walls | 3 perimeters or more | Thicker shell stops light glowing through |
| Infill | Higher than a decorative print | Fewer gaps inside the walls |
| Layer height | Medium, around 0.2 mm | Good layer bonding without long print times |
| Supports | Only where the model needs them | Support scars inside chambers can scratch film |
Test before loading film. In a dark room, put a bright torch inside the closed body and look for any glow at the seams, corners or through the walls. Where light shows, a coat of matt black paint on the inside or a strip of black tape on the outside deals with it.
Assembly
Assembly is quick, which is the point of the design. The hardest part is making a good pinhole.
- Clean the print. Remove stringing and any support material, especially along the film rails where a stray blob would scratch the emulsion.
- Make or buy a pinhole. Prick thin brass shim or drinks-can aluminium with a fine needle, sand the burr and measure the hole. A laser-drilled pinhole is the cleaner option.
- Fit the pinhole. Centre it in the mount and glue it, or hold it with an O-ring so it can be swapped later.
- Add the shutter. A strip of black tape over the pinhole, folded at one end for a grip.
- Load and close. Fresh film in one chamber, the leader taped to a take-up spool in the other, then the top secured with a rubber band.
Shooting with it
A 35 mm pinhole body of this kind has a short focal length, so the hole should be small and the view is wide. The pinhole camera guide shows how to work out the f-number from the hole and the depth, and the exposure follows the usual rule of metering at f/22 and multiplying.
Without a frame counter, advance is done by counting turns of the take-up. Mark the knob, make a test roll with blank exposures, and see how far one turn moves the film. A turn or so per frame is typical for small 35 mm pinhole bodies, with less needed as the roll fills the spool.
The look is pure pinhole: soft, wide and deep, with a dark fall-off at the edges. Printed cameras are light, so set them on something firm during exposures. A rubber band also makes a convenient strap to hold the camera against a post or a railing.
Film for the first roll
A fast, forgiving black and white film is the kindest choice for a first roll. Ilford HP5 Plus at ISO 400 keeps exposures short enough to give by hand on a dull day, tolerates a stop or two of error and develops easily at home or at any lab. Colour negative film works just as well and hides exposure mistakes even better. Slide film is best left until the camera has proved itself.
Twenty-four exposures rather than thirty-six make sense too. A shorter roll finishes sooner, so problems with light leaks, frame spacing or a badly centred pinhole show up within a week, not a month, and can be fixed before the next roll.
A printed camera shows the whole idea of photography in one object a student can hold.
In a classroom
The design was always meant for teaching as much as for photographers. A printed camera shows the whole idea of photography in one object a student can hold: light enters through a hole, crosses a dark space and lands on something that records it. Printing the bodies, making the pinholes and loading the film can fill one session; shooting and developing fill the next.
Paper negatives are a cheaper alternative to film in a school darkroom. They are slow, roughly ISO 3 to 6, so exposures run from several seconds in sun to a minute or more in shade, but a sheet of photographic paper cut to size and developed under a safelight gives a result in minutes. Cutting paper to fit a 35 mm gate is fiddly, though, and older students often move on to roll film quickly.
Where it fits among DIY cameras
Building with card, like the Viddy kit, needs no printer but takes longer and is less durable. A matchbox camera is cheaper still and teaches the basics in an afternoon. A printed body sits between the two, sturdy enough for daily use and quick to replace if lost. For anyone with a printer within reach, at home, at school or in a local makerspace, the Easy 35 is one of the simplest ways to get a durable pinhole camera for the price of some filament. Larger medium format and wooden designs are covered in the piece on 3D printed and wooden pinhole camera plans.
Because the licence allows remixes, variants have appeared with different shutters, tripod mounts and pinhole holders. Checking the remix list on the model page before printing is worth a minute, since someone may already have solved the exact problem in mind.
Frequently Asked Questions
Is the Easy 35 free to print?
Yes. The design was released under the Creative Commons CC BY-SA 4.0 licence and published on public 3D model sites. Anyone may print it, change it or even sell copies, provided the designer is credited and any modified version is shared under the same terms. The only costs are filament, a pinhole, a rubber band, some black tape and a roll of 35 mm film, which keeps the whole camera very cheap.
Which filament works best for a printed pinhole camera?
Black PLA or ABS is the usual choice, and the original design names both. Black blocks light far better than pale colours, which can glow when held up to the sun. PLA is easier to print and warps less; ABS copes better with heat, which matters for a camera left in a hot car. Matte filament also reduces stray reflections inside the body.
How is the pinhole fitted to the Easy 35?
The body includes a pinhole mount at the front. A bought laser-drilled pinhole or a home-made one, pricked with a needle in thin brass or drinks-can aluminium, is either glued into place or held by a small O-ring. The O-ring option makes it easy to swap holes later and compare sizes, which is a useful experiment on a camera this cheap to make.
What is the shutter on the Easy 35?
A strip of black tape over the pinhole serves as the shutter. It is lifted for the exposure and pressed back afterwards. That is crude but reliable for the exposures of a second or more that pinhole work usually needs. Some people print a sliding shutter from a remix of the design, which is easier on the fingers during a long session.