Camera
Viddy Pinhole Camera Kit: Build Notes, Weak Spots and First Shots
How the Viddy card pinhole camera kit goes together, which small tweaks stop vignetting and light leaks, and how to expose the first roll.
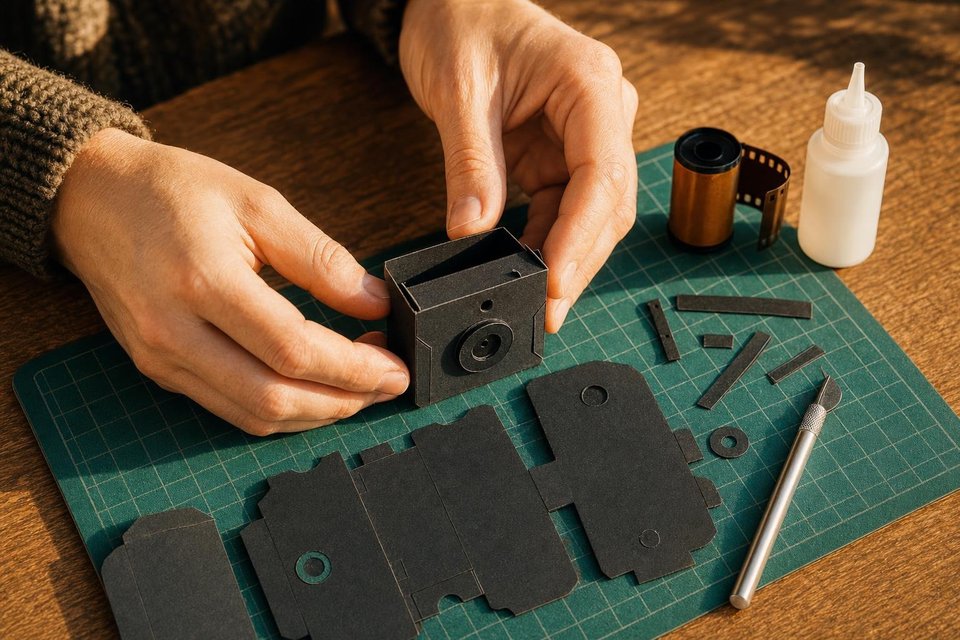
The Viddy is a flat-pack pinhole camera made of printed card. It arrives as a set of printed card sheets, a pinhole and instructions, and it leaves the kitchen table as a working roll film camera. The Pop-Up Pinhole Company launched it through a crowdfunding campaign as a smaller companion to its earlier Videre, and both kits have since been sold directly by the maker.
Card sounds flimsy. In practice a carefully folded Viddy is light, quite rigid and surprisingly good at keeping light out, provided a few weak spots are dealt with during the build. The notes below cover those spots, the decisions that cannot be undone later and what the first roll tends to look like.
Before the first cut
The single most important choice comes early: the Viddy can be built for 35 mm film or for 120 roll film, but not both. The film chambers and the back are folded for one format, and once the glue is dry the camera stays that way. Crowdfunding material made the dual-format option sound more flexible than it is, so it pays to decide before touching a knife.
120 is the stronger choice for most people. The focal length sits at roughly 80 to 90 mm, which is close to a standard view on medium format and a short telephoto on 35 mm. A pinhole image is soft by nature, and the bigger negative carries that softness far better than a 24 × 36 mm frame. 35 mm makes sense mainly if a lab nearby only handles small film, or if cheap expired rolls are piling up in a drawer.
Clear a proper workspace too. A self-healing mat, a fresh blade, a steel rule, PVA glue and a roll of black masking tape are the minimum. The instructions are published online, and following them on a phone propped against a mug is tiresome; printing them out first is the better plan.
Four tweaks during assembly
The kit goes together without trouble if the steps are followed in order. A handful of small extras, none of them in the official sequence, make the difference between an even frame and one with dark corners.
- Centre the pinhole. Line the pinhole plate up with the middle of the front aperture before the glue sets. A hole a millimetre off-centre throws one side of the frame into shadow.
- Keep the inner walls flush. Tape the internal panels tight against the pinhole mount so no card edge sits in the light path.
- Open up the front disc. The card disc that forms the lens assembly can be widened slightly with a knife. A larger opening stops it clipping the cone of light at the edges.
- Tape every seam twice. Black tape over the joins, the corners and the film chamber ends costs nothing and removes the most common cause of fogged frames.
Vignetting is the complaint most often raised about the Viddy and its sibling, and almost all of it comes from the first three points. When the hole is centred and nothing obstructs it, the frame comes out evenly lit from edge to edge.
Light leaks are rarer than the material suggests. The card is thick and the light baffles are well designed, so a camera with taped seams usually passes a torch test in a dark room without a single pinprick of light showing.
A few steps in the instructions are less clear than they could be, especially around the back and the winding key. Dry-fitting each part before gluing avoids most mistakes. The overall design is good enough that a slightly untidy build still works, which is reassuring for anyone who rarely makes things by hand.
The shutter tab sticks out from the side of the body and gets pushed and pulled for every frame. After one roll it starts to soften. Two thin wooden splints, such as coffee stirrers, glued along its length make it far stiffer and keep the shutter closing cleanly.
Shooting the first roll
The finished camera weighs almost nothing and slips into a bag with room to spare. That alone changes how it gets used: it comes along on errands, sits on walls and benches, and ends up making pictures that a heavier wooden box would never have been carried out for.
There is no f-stop printed anywhere on the body. The kit includes an exposure guide, and a companion phone app does the same job, so most people start with those and a little instinct. Negative film forgives a stop of error in either direction, which makes that loose approach workable. Slide film is a different matter, and anyone loading it should measure the pinhole under a loupe and calculate properly.
The arithmetic is simple enough. If the hole were the ideal size for an 85 mm box, about 0.34 mm, the camera would work at roughly f/252. That is around 131 times the exposure needed at f/22, so a metered 1/125 s on a bright day becomes about one second, and anything past that point needs reciprocity correction on film. The Zero Image exposure guides explain the dial method many pinhole users rely on instead.
| Meter at f/22 | Calculated time | Typical light |
|---|---|---|
| 1/250 s | 0.5 s | Bright sun, fast film |
| 1/125 s | 1 s | Hazy sun |
| 1/30 s | 4.4 s | Open shade |
| 1/8 s | 16 s | Overcast late afternoon |
| 1 s | 131 s | Bright interior |
Holding the camera still matters more than getting the exposure exact. A card body has no tripod thread, so the first roll usually teaches the habit of resting it on a wall, a step or a café table and pressing it down gently while the shutter is open.
What the negatives look like
A well-built Viddy produces the classic pinhole picture: soft all over, deep in focus, with gentle fall-off rather than hard black corners. On 120 the long focal length gives a calmer, less distorted view than most pinhole cameras, closer to an ordinary standard lens than to the stretched wide angle of a short box.
Scans are where a lot of first rolls go wrong. A rushed home scan with dust and poor levels can make a perfectly good negative look muddy, so it is worth judging the camera from a lab scan or a careful contact print before deciding it is soft.
Who the kit suits
The Viddy is a fine first pinhole camera for anyone who enjoys a craft project and wants to learn exposure on a cheap, light body. It is less suited to someone who needs to switch film formats or wants a camera that will survive years of being thrown around without repair. For that, a wooden box from the pinhole camera guide or a printed body like the Easy 35 is the better long-term bet. As a weekend build that actually delivers usable negatives, though, the little card camera is hard to fault.
Buying direct from the maker is the sensible route. Second-hand listings sometimes ask far more than the kit cost new, and a used one may already have a softened shutter or a lifted seam.

Frequently Asked Questions
How long does the Viddy take to assemble?
The maker quotes roughly half an hour, and a practised hand can get close to that. A first build usually runs longer, because centring the pinhole, taping the inner walls flush and checking every seam for gaps is slow work. Plan an evening, keep a cutting mat, a sharp knife and good light on the table, and do not rush the glue. A camera that took two hours and has no leaks beats one finished in thirty minutes.
Can the Viddy shoot both 35 mm and 120 film?
It can take either format, but the choice is made during construction. The film chambers are folded for one or the other, so a camera built for 35 mm stays a 35 mm camera. Anyone who wants both will need two kits. For most people 120 is the better pick, because the larger negative hides softness and grain, and the focal length suits the frame.
What is the difference between the Viddy and the Videre?
Both are card pinhole camera kits from the Pop-Up Pinhole Company. The Videre came first and is the larger box, built around medium format roll film. The Viddy is the smaller follow-up, launched through a crowdfunding campaign, and offers the option of building it for 35 mm or 120. Assembly methods are similar, so anyone who has built one will find the other familiar.
How do you work out exposure without a marked f-stop?
Use the exposure guide that ships with the kit, or measure the pinhole and calculate. Divide the focal length, roughly 80 to 90 mm, by the hole diameter to get the f-number. Meter the scene at f/22, multiply by the square of that f-number divided by 22, then add reciprocity correction on film once the time passes a second. Negative film forgives a stop or so of error.
Is a card camera durable enough for regular use?
With care, yes. The weak point is the shutter tab that sticks out of the side, which softens with handling. Gluing thin wooden splints or a strip of plastic card along it makes a big difference. Keep the camera out of rain, store it flat and away from heat, and re-tape any seam that starts to lift. Treated that way a card body lasts for many rolls.